"Factory" Tow Hitch Installation
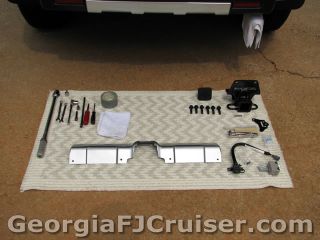
First, get your Toyota FJ Cruiser Tow Hitch and Wiring Harness Kit. (FJ HITCH part number PT228-60060 and WIRE HARNESS FJ part number 08921-35870) I paid just $235.56 shipped from an online retailer, which resulted in the parts actually being shipped to me from a dealer in Charlotte, NC. I placed my order on 06/28/2006 and received my parts on 07/06/2006 via UPS.
This installation was done in accordance with these factory instructions:
toyota_fj_cruiser_tow_hitch.pdf (273KB)
toyota_fj_cruiser_towing_wire_harness.pdf (503KB)
I did run into a few things that would have been helpful to know before the tow hitch install. To do it right took a bit more time than you might think. The harness install beneath the dash was the most difficult and confusing to me. Hopefully someone can benefit from these additional notes, tips and instructions based on my experience, as well as the following pictures:
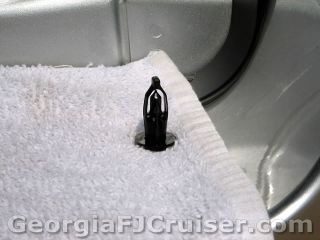
I just used some duck tape - lightly applied - and a rag to cover potential scratching points
 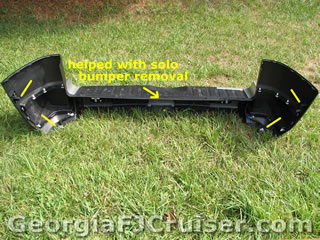
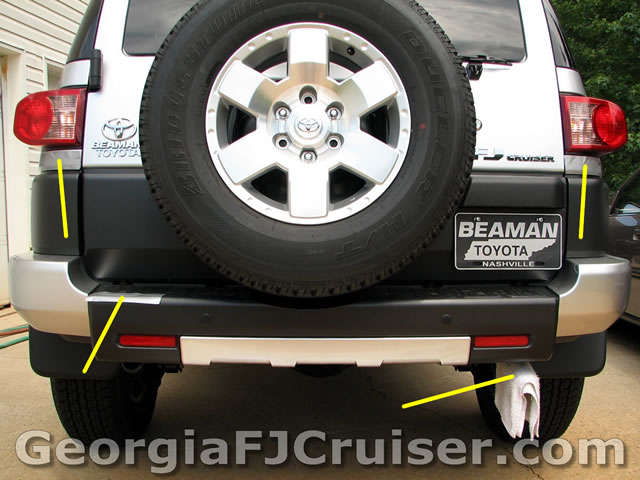
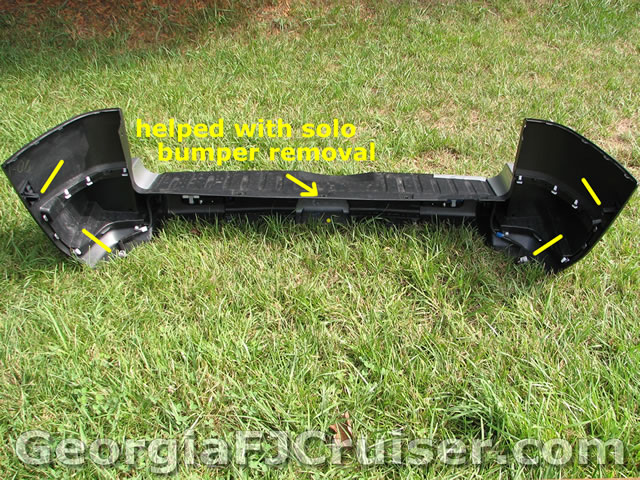
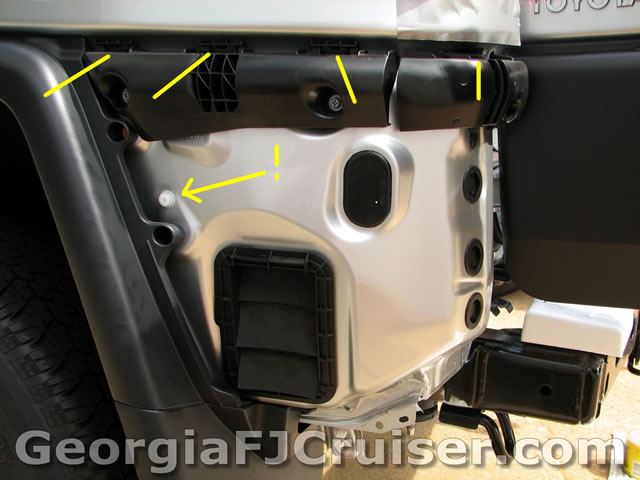
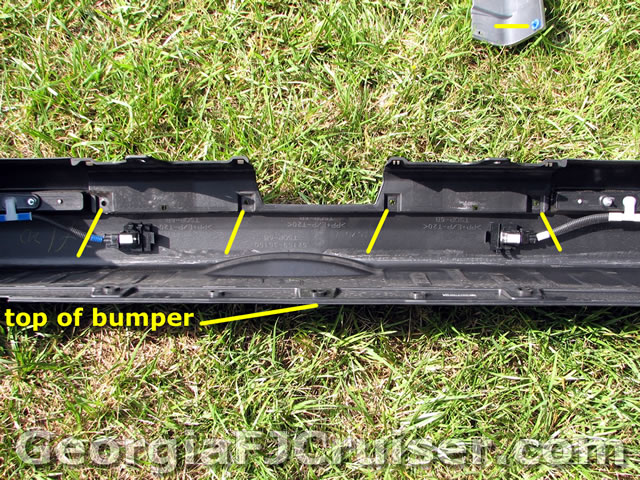
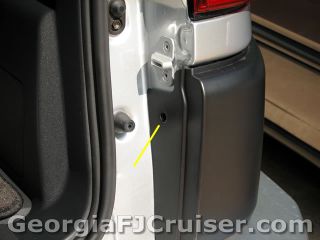
I did this installation alone. It is recommended that you have someone assist you with the removal and installation of the rear bumper, carefully. I loosened and used the top center screw of the rear bumper to hold the bumper in position until I was ready to move carefully rearward with bumper. I then walked it over to a grassy area and set it down carefully. This worked perfectly fine for me. Note the wiring connectors located at the bottom of the bumper on the extreme right and left side. These support the rear sonar devices if you have that option on your vehicle. These must be checked and disconnected prior to bumper removal.
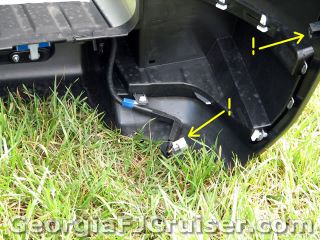 
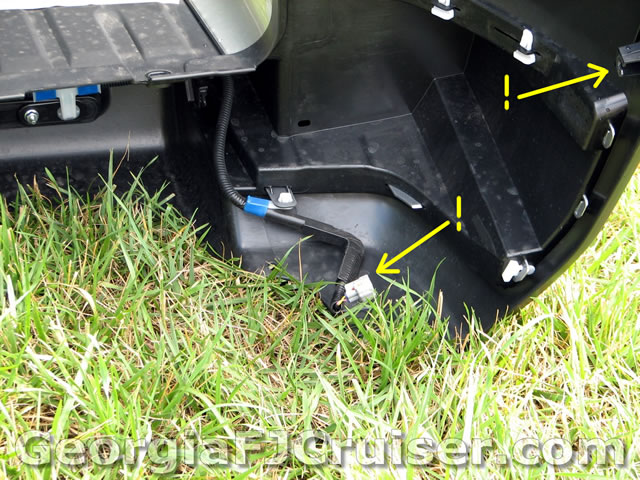
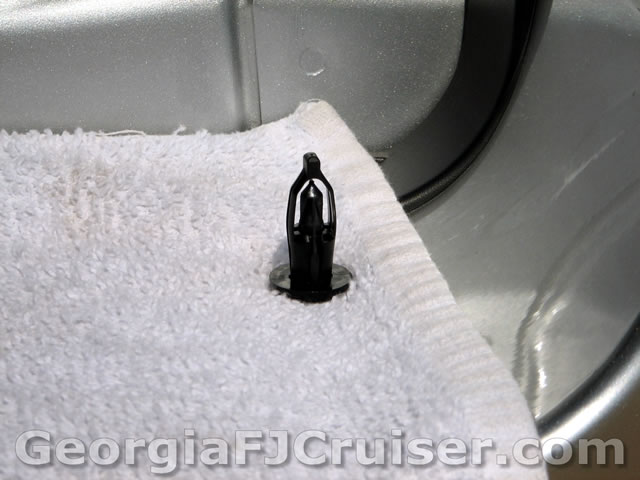
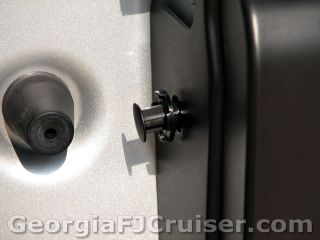
A closer look at a rear sonar wiring connector. The arrows with exclamation points are something I discovered needed special attention when removing and installing the rear bumper. It was my experience that when pulling the sides of the rear bumper away from the vehicle to "un snap" it from the body, the white "snaps" unsnapped from the bumper and stayed on the vehicle. They may need to be removed separately and held in place with your finger on the bumper upon installation. It was a little tedious during installation to hold the white snap in position on the bumper while snapping the rest of the snaps in place, but it can be done. You will likely want to start with the rearmost snap beneath the taillight lenses and snap the bumper in place sort of one snap at a time moving forward, towards the front of the vehicle.
 
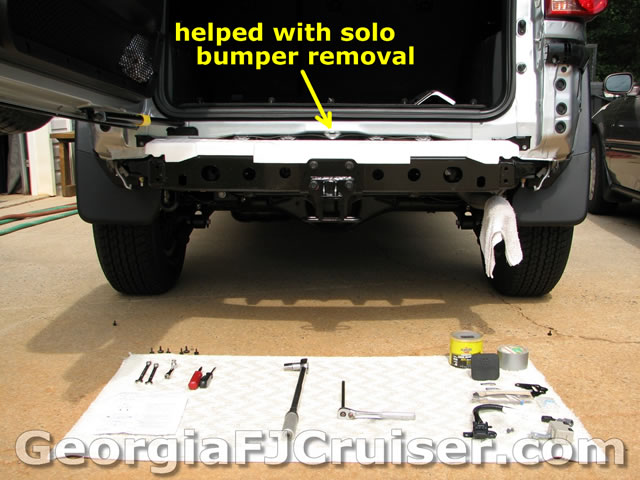
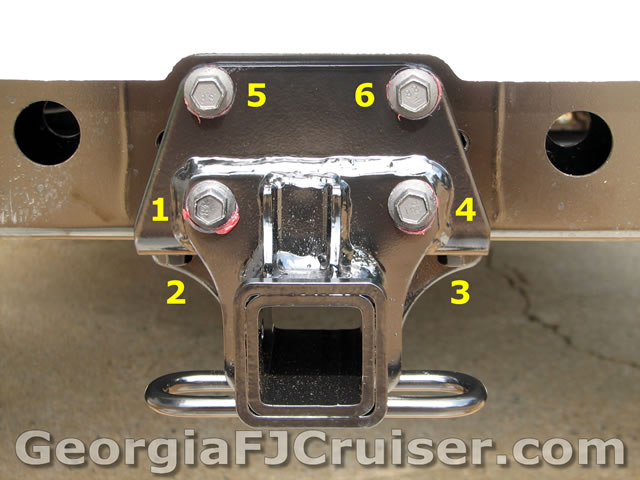
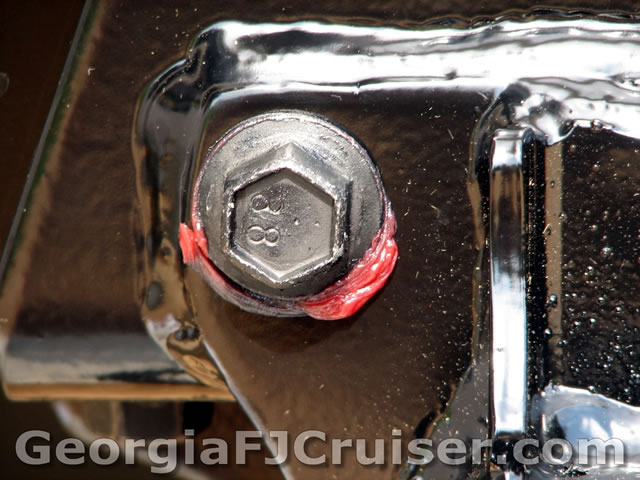
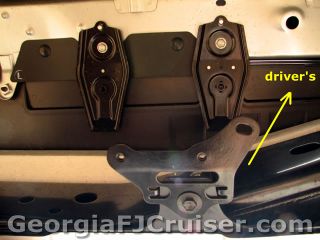
Make sure you follow the torque sequence instructions and torque the bolts to spec (80 ft. lbs.). While doing this I had the sensation that I was over tightening bolt number one and was stripping threads, but that did not wind up being the case and everything went in just fine. The other picture of the grease is just me going an extra step in rust prevention long term as we all know how much water and road grime this area of the FJ Cruiser will see with years of use.
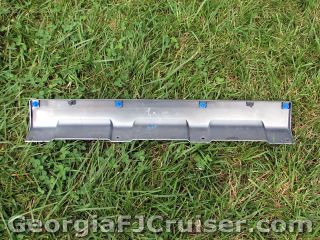 
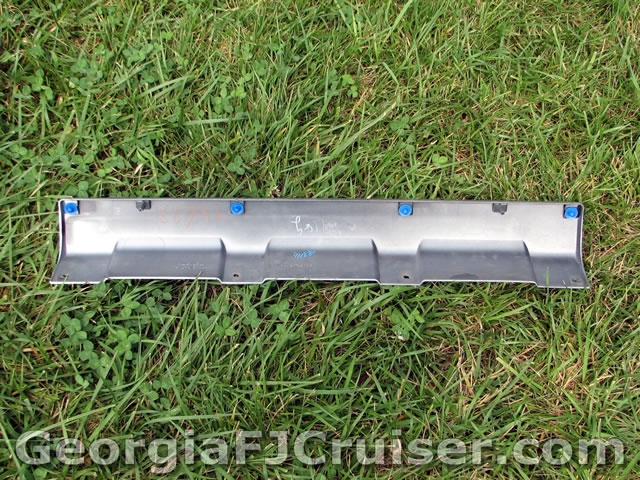
Nothing real special here other than me indicating where the blue snaps came from on the bumper and where they were on the old painted plastic molding.
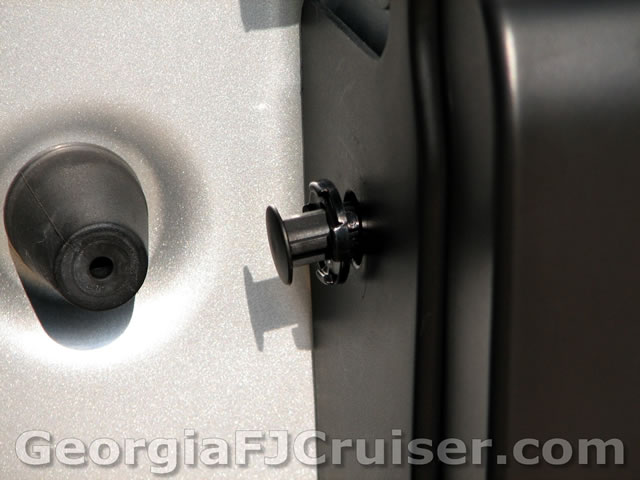
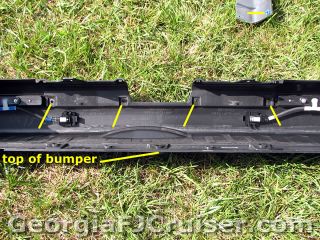
These pictures simply show the blue snaps in place on the new painted plastic molding and a snap that is used to affix the bumper as a matter of visual reference so you know what type it is and can avoid potentially breaking or weakening it. I have no clue why Toyota decided to use this snap in this location other than perhaps for a flush mount, or perhaps it was an afterthought to secure this part of the bumper to the vehicle.
 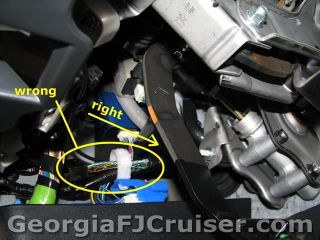
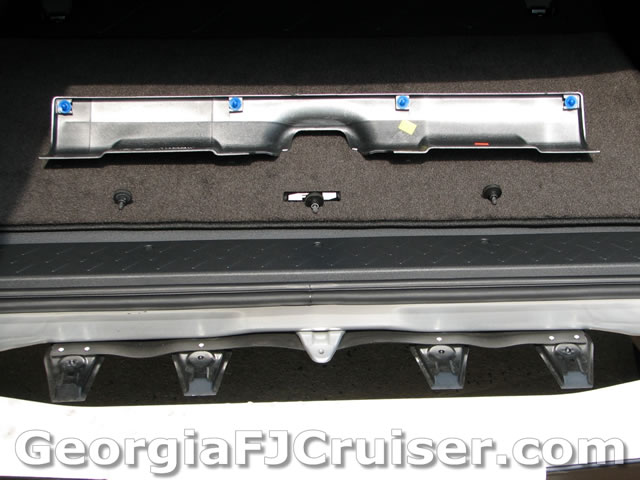
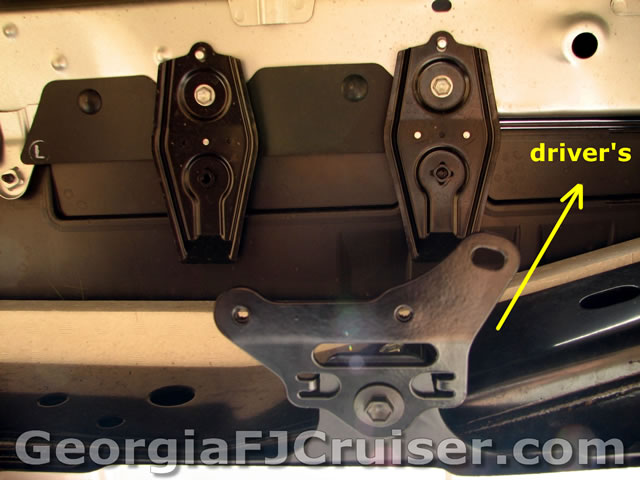
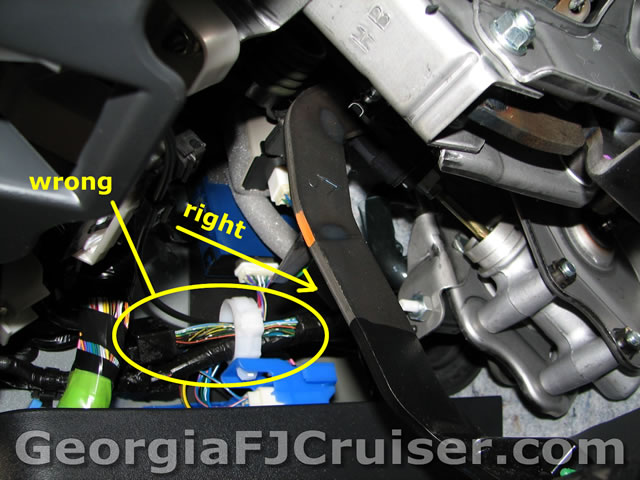
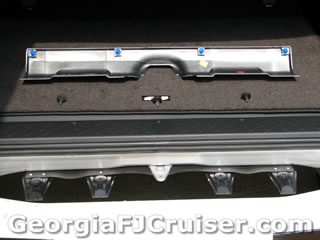
The Toyota instructions weren't very clear at this point in the process - at least not to me. The rear wiring connector mounting plate should be installed like the picture shows above. Now, this is where things got a bit confusing and tedious for me... Once again the instructions weren't much help in identifying what I needed to do to install the Converter underneath the dash; therefore, I wound up accidentally spending about 30 minutes carefully cutting away and removing the incorrect wiring connector that was taped into the wiring harness. I cannot say if this will be the same visually for everyone but the connector I mistakenly unwrapped and exposed from the harness was completely wrapped in black factory electrical tape. It turned out the the correct connector was actually a few inches further down the harness (towards the front of the vehicle) and much easier to free from the harness. I will at some point go back and try and "wrap up" my mistake.
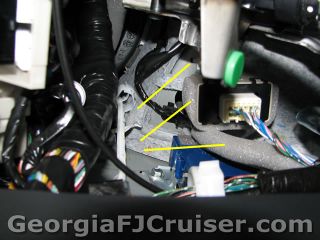 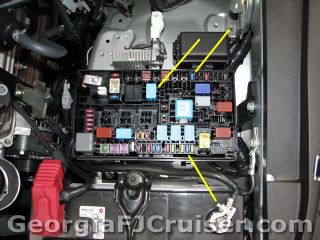
The picture above shows the correct installation and location of the Converter as well as the Packing they refer to in the instructions. Lastly, this picture shows the location of the fuses and the relay in the location under the hood, right behind the battery.
I hope this helps anyone wanting to attempt this FJ Cruiser tow hitch installation.
|